When I was a kid, we didn’t have garbage collection. Like everyone else in our corner of rural New Jersey, we had an open-top 55-gallon drum in our backyard into which we put the garbage, and once a week, Dad would light it up. Bear in mind, this was just 40 miles outside of Manhattan. Things were different in the 1950s. Sometime in the 1960s, though, New Jersey outlawed burning your own trash and we started having to pay for garbage collection. I’m sure Tony Soprano’s forebears figured into that transition somehow, but it was what it was.
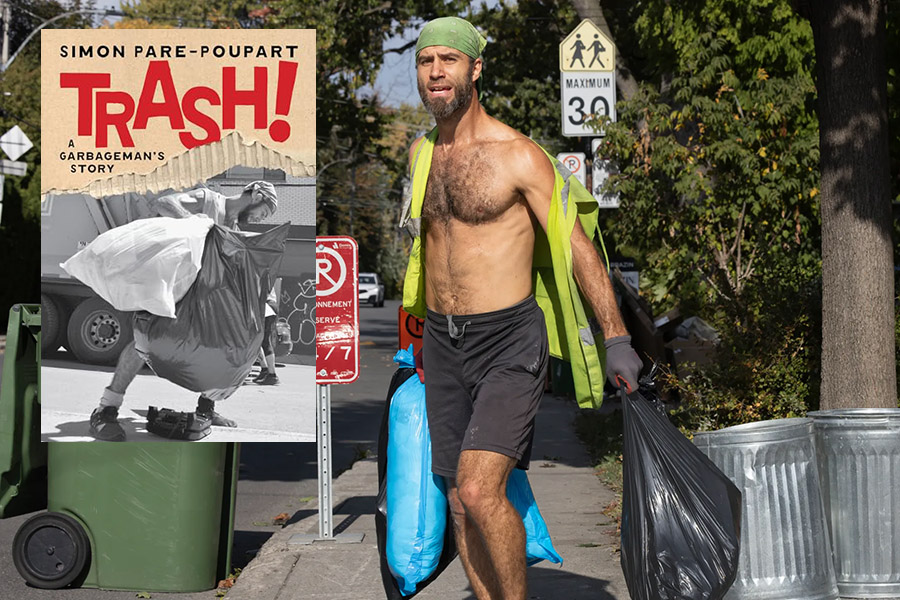
Fast forward another 50+ years, and I was lucky enough to be blessed with my first grandson. It is fun watching him grow and observing the phases kids today pass through. One of the most interesting ones has been his fascination with garbage trucks and the guys who man them. For that reason, when I read a brief review in The Wall Street Journal on Trash!, I had to order a copy. It’s an easy but fascinating read, and I read it in a day. The author, Simon Paré-Poupart, writes quoteworthy paragraphs throughout. The most poignant one, which exactly describes the phase my grandson passed through, hit me on Page 36:
When kids see the garbageman, sometimes even their garbageman, they fall in love. He’s their idol. They’re so impressed by the truck that they worship the man who seems to tame its force, unafraid of its growling engine and its iron maw. Children are entranced by the garbagemen in the same way we have always admired heroic lumberjacks like Paul Bunyan in the United States or Jos Montferrand in Canada, strongmen from Heracles to Louis Cyr, the fearless log drivers that once plied our rivers…Kids just can’t get enough of us. They’re the only ones who can look beyond the dirt and the smell to love us.
Paré-Poupart is a well-educated garbage collector, and despite his credentials and by personal choice, he stayed on the lowest rung of the trash collector hierarchy. He was one of the guys who ran behind the truck and hefted the bags and cans into the hopper. The writing is so good that you could almost feel yourself there. His central premise is that being a trash collector completely eliminates and of the anxieties most folks would ordinarily feel. You’re already at the lowest position you could possibly occupy in society. There’s no going any lower. And, being a trash collector is tremendously strenuous, and as such, it provided all the endorphins and the natural rush that accompanies other athletic endeavors.
Paré-Poupart wrote quite a bit about the disdain of the communities trash collectors serve, and the reasons why such disdain is misplaced. It made for interesting reading.
Paré-Poupart wrote about the enormous amount of waste modern societies generate, and that the world cannot continue to generate trash at its current rate. I believe there’s a lot of truth in that. When I was a Cal Poly Pomona faculty member, we taught that same concept in the engineering curriculum. It’s interesting: Paré-Poupart occupied what he and many others might regard as one of society’s lowest rungs, and faculty members in an engineering college occupy what many might consider one of society’s highest (i.e., an engineering professor), yet both espouse the same thoughts on waste generation (an issue not generally recognized by society).
Back to my grandson’s fascination with garbage trucks and garbage collectors: My son-in-law discovered that there are numerous YouTube videos on that very topic. My grandson, my son-in-law, and I found them mesmerizing. Here’s an example:
Trash! is a good read. My guess is that it will be a movie before too long, and I’ll watch it, too. But don’t wait for the movie. Trash!, at $18.99, is money well spent. I enjoyed it and I think you will, too.
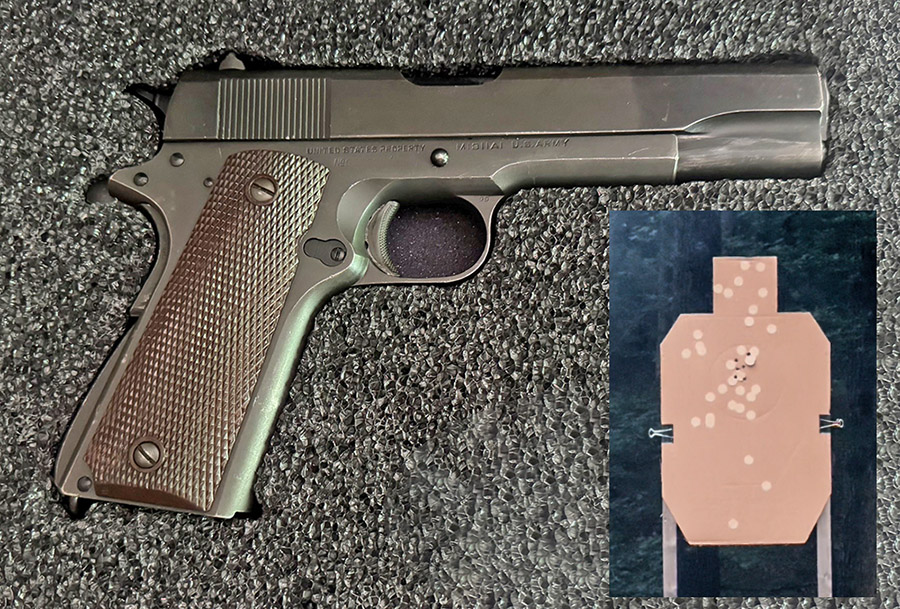
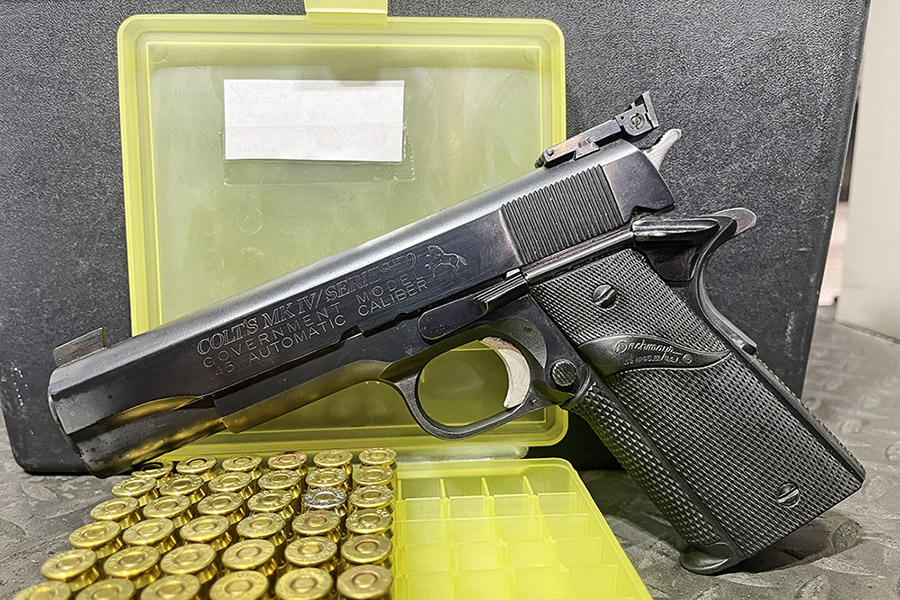
There’s something about a U.S. Army 1911A1 that’s just right with the world, and when I received an email from good buddy Robby about his very recent acquisition of a Service Grade .45 Auto from the Civilian Marksmanship Program (the CMP) I immediately knew it would be something I wanted to share with our ExNotes community. Robby’s 1911A1 is the one you see in the photo above, and it is a beauty.
Robby included this video that shows him shooting his new toy. It’s fitting for our 4th of July weekend and for this blog.
Robby’s 1911A1 was manufactured in 1943 during World War II. Having been in the Colt factory and being both a 1911A1 and milsurp weaponry fan, I was curious as to how many 1911A1s Colt made during the War. I Googled the topic and here’s what came back:
Colt made roughly 102,000 M1911A1 pistols in 1943. Production spanned serial numbers 856101 to 958100. This batch included a small group of about 6,575 commercial-to-military converted pistols. During this year, Colt’s total represented only a fraction of the over 750,000 pistols produced across all wartime manufacturers. Because records were shared or duplicated, some 1943 serial blocks (like 856405 to 916404) were assigned to other makers, like Ithaca.
As I wrote above, I have an affinity for military 1911A1s that dates back to my first experiences with the Colt .45 Auto (see the blog on Command Sergeant Major Emory Hickman). Shortly after CSM Hickman taught me how to shoot the .45, I went to the Republic of Korea where I was a platoon leader in the 38th Air Defense Artillery Brigade. When I was over there, our battery’s arms room had about a dozen 1911A1s from various makers. I carried one, but I didn’t get to shoot it until I’d been in country about 8 months. We had no place to practice on our missile site, so I couldn’t shoot the different 1911A1s we had to see which one I liked best. I selected my .45 using an approach that was about as unscientific as could be. I went into the arms room and shook them all (one at a time), and I picked the one that rattled the least. I guess my approach worked well enough, because even though I hadn’t shot a pistol in several months, I won the 38th Brigade pistol championship. By the way, Robby is a competitive shooter, too, and (unlike me) he’s in his prime. If Robby had been in the 38th Air Defense Artillery Brigade 50 years ago, I wouldn’t have come home with that trophy.
Today, America’s 250th birthday, is obviously a very special day. As Bill Clinton once said, there have been a lot of people who bet against America in the last 250 years, and they’ve lost money every time. He’s right. We’re not perfect, but I am convinced we’re the closest thing to it. Enjoy the day, happy 4th of July, and here’s to another 250 years!
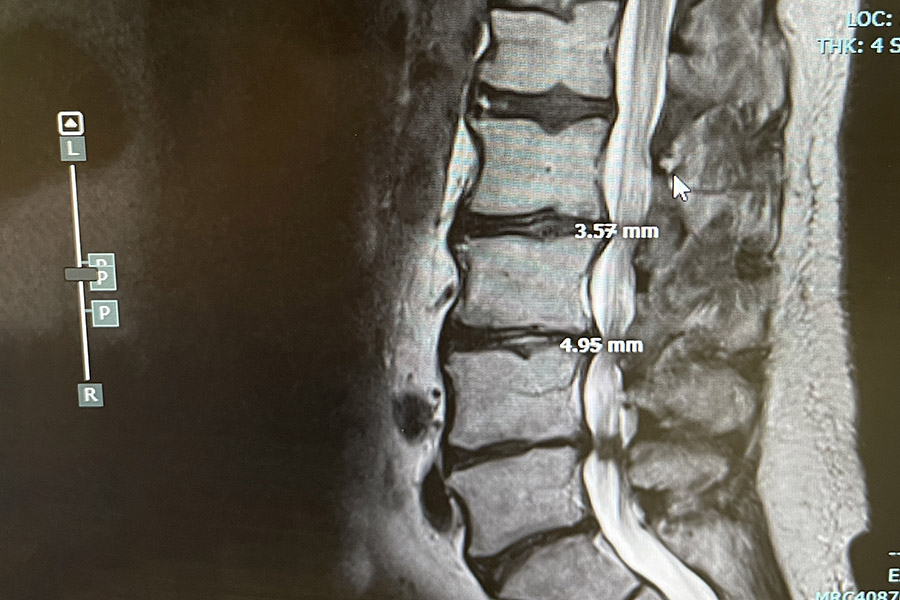
First, a bit of background info: I had back surgery just over a week ago. Some of you asked for updates, and I’m responding to those requests. I’m progressing well. The surgery helped enormously, and after a decade and a half of pain, I’m feeling a lot better. My endurance isn’t where it needs to be yet, but with short walks (growing longer each day), I’m getting there.
So where’s this story going? I don’t mind sharing that before the surgery, I was apprehensive. I’d heard all kinds of ominous things about back surgery. My biggest fear was that I’d be worse after the surgery than I was before, or that the surgery would make no difference. None of that came to pass. I made a good decision, my surgeon was a gifted doctor, and I’m improving every day. But in the days leading up to it, I was feeling down. So I did what I normally do to feel better: I bought a gun.
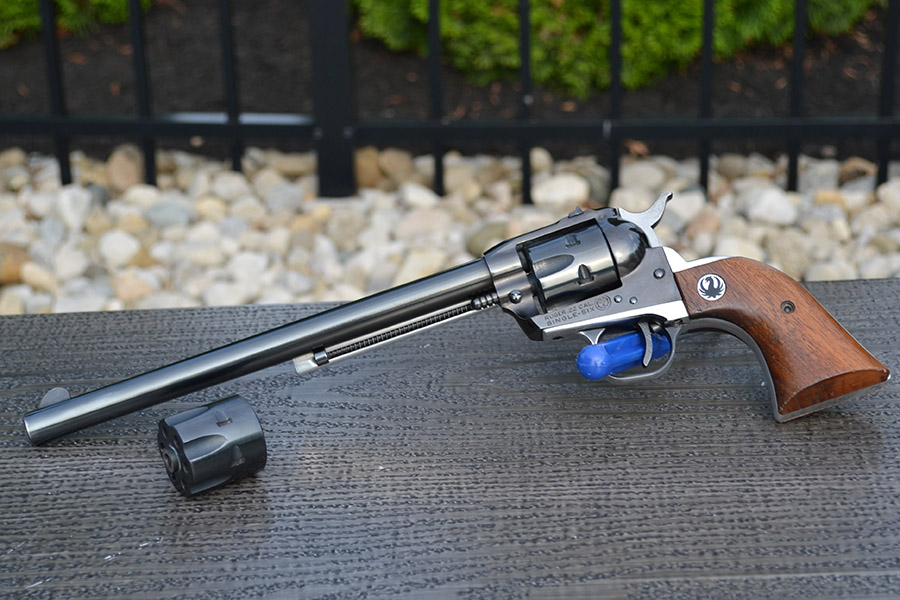
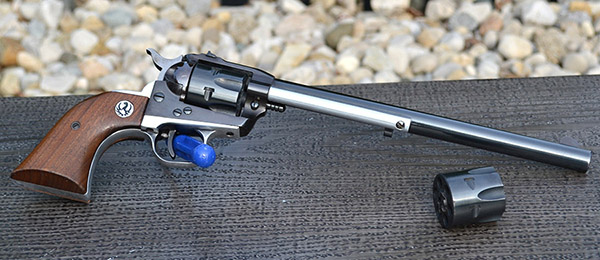
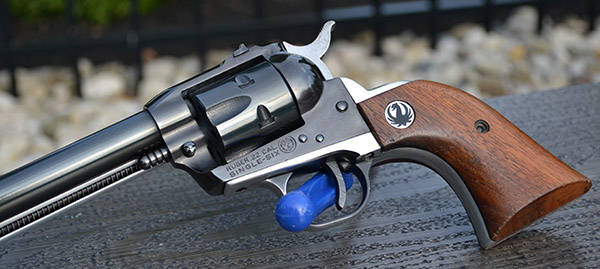
Not just any gun. It’s a Ruger Old Model Single-Six with 9 1/2-inch barrel. It had been lightly customized (the grip frame and ejector tube were polished instead of the standard anodized aluminum). The price was more than right (at a scant $395, the gun was way below what it would normally bring). Old Model 9 1/2-inch Single Sixes are not very common and they command a premium in the collector market. This one even included the optional .22 Mag cylinder. I follow several online gun forums, and when I saw the post advertising this Single Six, I pounced (it was a no-brainer for me). The online post had been up for exactly 28 minutes before I responded with “I’ll take it.” And I’m glad I did.
When the gun arrived at my local FFL, I was ecstatic. It looks even better in person than it does in these photos. That $395 price was a good thing, but boy oh boy, does California and the federal government ever screw you on the sin taxes they levy on guns. I don’t know this for a fact, but I’d be amazed if any of the hoops California makes a gun buyer jump through ever prevented a crime anywhere. Fortunately, the U.S. Supreme Court is starting to dial back some of these outrageous cash grabs and ridiculous laws (the latest being the Supreme Court decision on Hawaii’s nutty concealed carry restrictions). That effort needs to be accelerated. I’m for nationwide recognition of any state’s concealed carry permit, doing away completely with any state’s approved gun roster, and the elimination of any special taxes on gun purchases. Our state and federal governments have better things to do. But I digress. Back to the Single Six.
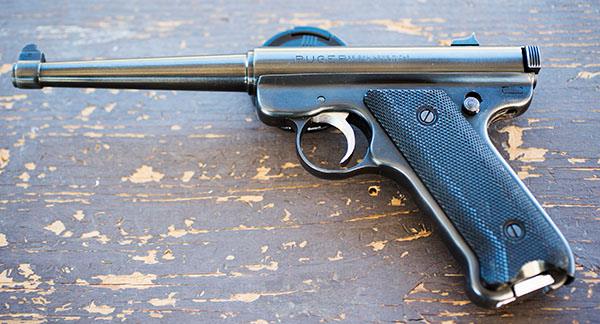
The story behind the Ruger Single-Six is tied to our 1950s/1960s obsession with the American West. Ruger was a new company back in the 1950s. They had already hit a home run with their .22 autoloader handgun (the Ruger Standard Model) when they decided to emulate the Colt Single Action Army in a .22 revolver, and the new Ruger sixgun has been in production ever since.
Ruger’s .22 Autoloader. This particular one resides in my gun safe.
The Ruger Single Six entered the marketplace in 1953. With it, Ruger created a new market niche, and Ruger sold every one of these guns as fast as they could make them. The 9 1/2-inch version was introduced in 1959, and it appealed to collectors, target shooters, small-game hunters, and folks who just liked that it was something different. I’m in the collector/target shooter category. The Single Six you see above was manufactured in 1968. That makes it 58 years old. A youngster, in gun years.
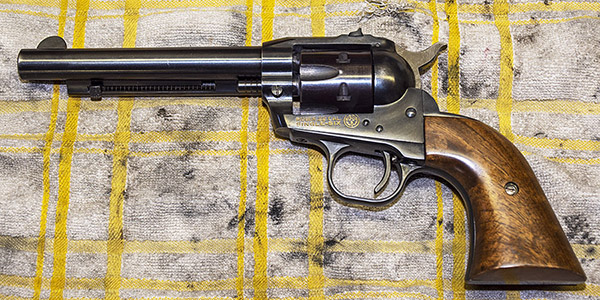
This is not my first Single Six, and it’s not the first time we’ve written about the Ruger Single Six. My Dad owned one from the first full year of production, and it became mine when he passed. It’s the revolver you see below, and you can read about it here.
It will be a few more days before I can drive again, and I have some restrictions on lifting anything above a certain weight (don’t tell Sue, but I’m milking these restrictions for all they are worth). The bottom line is that I haven’t shot the new Single Six yet. Once I’m able to get around a little better, I’ll shoot both Single Sixes in a side-by-side comparo, maybe with a few different ammo types. Stay tuned.
All three pistols in this blog are favorites, and all three have been tuned by good buddy TJ (of TJ’s Custom Gunworks). There’s a message there. He does great work.
Before my back surgery last Friday, I wanted to get to the indoor pistol range. I enjoy shooting there, and I didn’t know how long it would be before I could do so again. And I had ammo I wanted to use that I had loaded several years ago. I don’t think it’s really necessary to rotate my ammo stash, but I do so, anyway. The plan was to shoot two 1911s and my 9mm Shield, and get a little practice in with all three. One of the 1911s was the gorgeous MacManus Award Series 70 1911 Government Model you see above; the second was my bright stainless Series 80. The 9mm was my Shield. I’ve written about all of these pistols before; you can find those stories here.
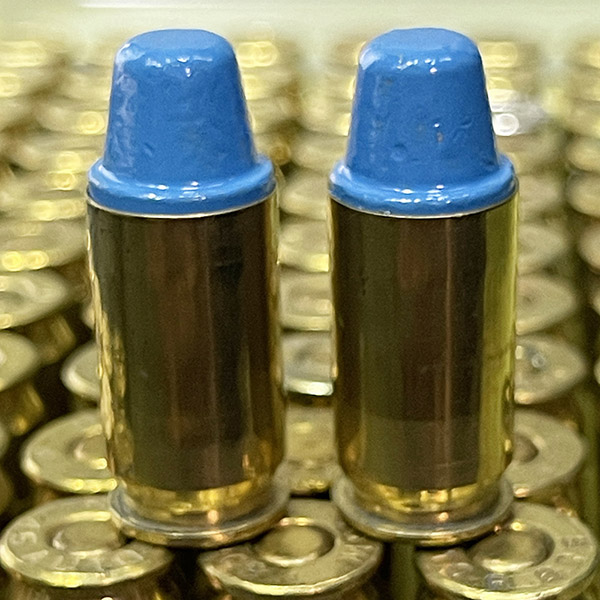
185-grain powder coated semi-wadcutter bullets with 5.0 grains of Bullseye. This one of my favorite .45 ACP loads. In addition to being accurate, this is good-looking ammo.
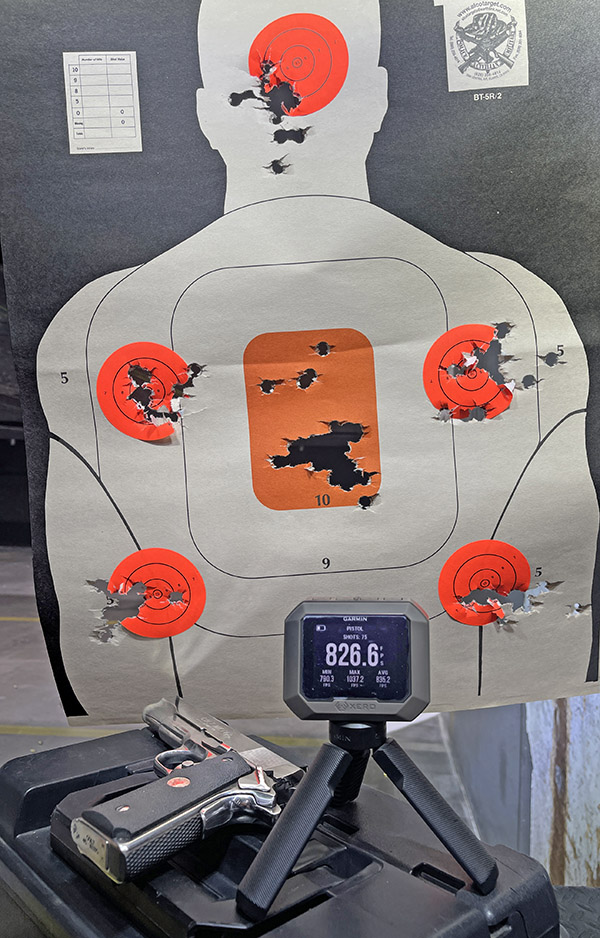
When I arrived at the range, I sent one of my Alco targets down to the 10-yard line and started shooting at it with my Series 80 1911. It’s the bright stainless version and it’s gorgeous. TJ added a Les Baer barrel, Millet sights, and a few other touches to this gun, and it is a joy to shoot.
The 5.0-grain Bullseye/185-grain powder coated semi-wadcutter load averaged right around 835 feet per second. The spread was a bit more than I would have thought, but that’s okay. Or maybe it wasn’t. Sometimes the Garmin picks up a round from an adjacent lane, and if it caught a 9mm round, that would explain the higher velocity shot above 1000 fps.
I tend to get my money’s worth out of a target, and this one was no exception. Surprisingly, after firing the 75th round (out of a box of 100 cartridges), the 1911 experienced a failure to eject. The empty case just sat there, kind of wedged between the barrel hood and the slide. Hmmm. I looked in, and the extractor had slid forward. It broke. I’ve experienced that before on another 1911 (my RIA Compact), so I wasn’t shocked. Maybe just surprised a little. The bright stainless 1911 is the 1911 I shoot the most. I’ve been sending lead downrange with it since 1986, so having the extractor fail after 40 years of heavy use…well, I’ll live with that. It was off the TJ’s for fitment with a new extractor. I should get the gun back sometime early next week. But I digress. Back to today’s blog.
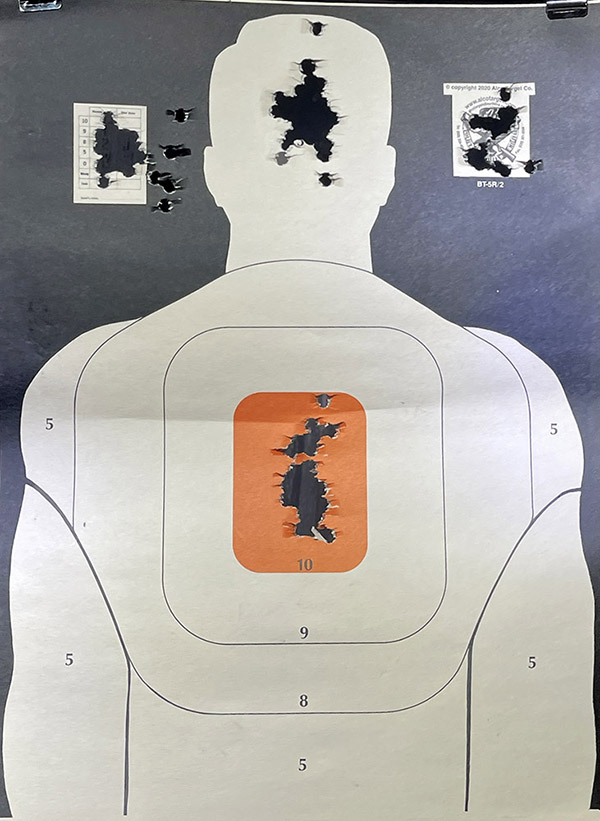
I sent a fresh target downrange and started firing the same ammo (my .45 ACP reloads) through the MacManus Series 70 1911 (the blue steel 1911 at the top of this blog). The target you see below? I put 125 rounds through it.
125 rounds through an Alco target. Like I said, I like to get my money’s worth out of a target.
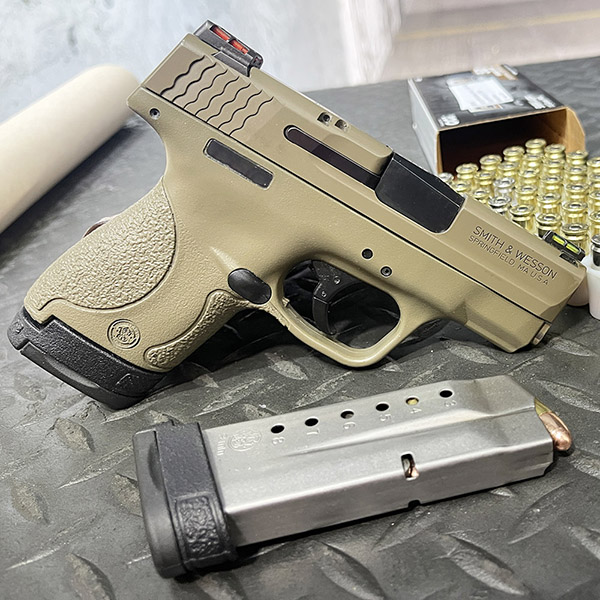
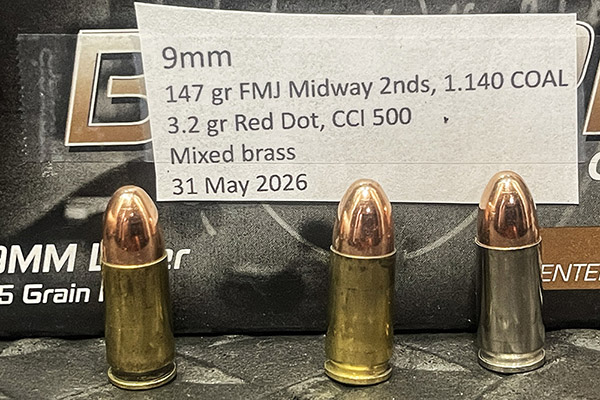
With that, I had fired 200 rounds of .45 ACP so far that morning, and I had expended all of the reloaded .45 ammo I brought with. It was time to move on to the 9mm. I wanted to use another lot of ammo I had reloaded, this time with the 147-grain Hornady full metal jacket bullet in my Smith and Wesson Shield (another pistol tuned by TJ). The Shield is the firearm I usually carry when I’m carrying, and I like to stay proficient with it. I like the a full-sized 1911 a lot more than the compact Shield, but the Shield is a much more concealable handgun and it is way easier to carry.
My Smith and Wesson Shield. It’s compact. It’s easy to carry. And I love the hi-viz sights. TJ slicked it up a bit for me.
I mentioned a while back that I have a big bottle of Red Dot propellant, and earlier testing showed that 3.2 grains of this powder with a 147-grain full metal jacket Hornady bullet is one of the Shield’s sweet spots.
The straight scoop on a great 9mm load. This particular combination is extremely reliable and relatively accurate.
I had another one of my Alco silhouette targets (is the guy facing toward me, or away from me?), and I sent 100 rounds downrange toward it, too.
Another target, another 100 shots. My point of aim was at 6:00 on the orange bullseye.
I had a nice morning on the range. All the ammo I brought with me was old stuff, reloaded with brass that had been reloaded many times. I didn’t bother collecting it. I just swept up my area and left it for the range’s recycler. That felt like I was doing something wrong (not picking up the brass), but with back surgery two days away I wasn’t bending too well that morning. I’ve got plenty of brass.
I’m a big fan of GMT watches, and in that world, the Pepsi Rolex is perhaps the most desirable. This video (mentioned in my previous blog) tells the story better than I ever could, so I’ll let it do the talking:
The video is good from the perspective of the watch’s history and it is good in telling the story behind Rolex’s masterful control of supply and demand.
Back in the 1970s and 1980s, any Rolex was a status symbol. I know it sure was in the US defense industry. The most commonly-worn one was the Pepsi with an aluminum bezel (the ceramic bezel was still a few decades into the future). One of my fellow Yuppies in the Aerojet heirarchy explained to me that Pepsi with a worn aluminum bezel (like his, with a scratch or two, and faded colors) was even more of a status symbol, as the worn bezel implied that the wearer had been successful for a while. I don’t think that was true, but hey, it was his watch, he believed it, and it made him happy.
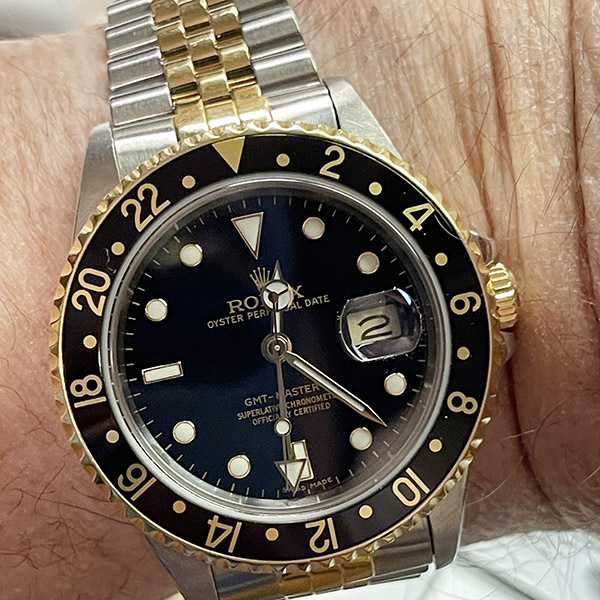
Most of the the Rolex GMT watches have bezels with two different colors, one for the a.m. hours and one for the p.m. hours. On the Rolex “Pepsi,” the p.m. bezel hours are blue, and the a.m. hours are red. The red and blue colors are similar to those on a can of Pepsi, hence the name. There’s also a Batman nickname, for bezels with blue and black, and a Coke nickname, for bezels in red and black. There are a few others, but I don’t know them all.
My Rolex is a two-tone watch (stainless steel and gold, as you see above). I just had mine serviced by the wizards at LA Watchworks in Pasadena and they did a great job. It wasn’t cheap, but hey, what is anymore?
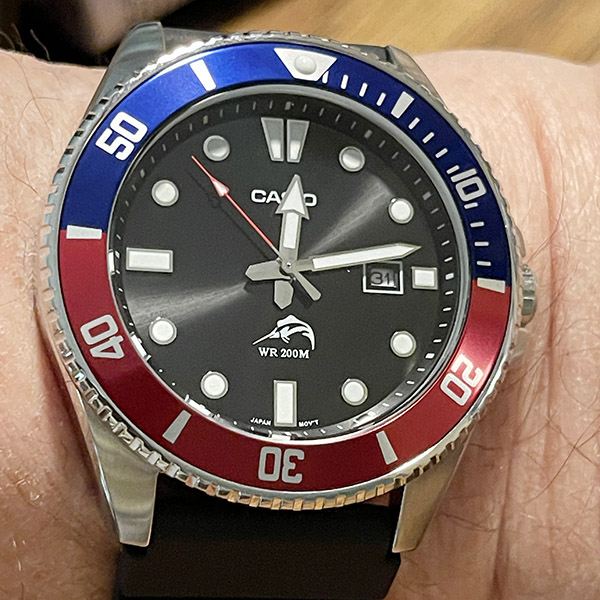
Well, that’s a good question. I thought it might be cool to own a Pepsi, but I didn’t feel like shelling out $40K for a Rolex Pepsi. So I did the next best thing.
The Casio Pepsi dive watch above was on sale on Amazon for $53 a few weeks ago, and I couldn’t let that get away. And you know what? I am enjoying the Casio just as much. It actually keeps better time than the Rolex, too.
A group I used to hang out with at Brown’s BMW met every Saturday at the dealership before going to lunch. There were some cool characters there and the conversation was always lively. One guy was constant talk (let’s call him Mr. NeverShutUp), and he just went on and on, on any topic. Motorcycles. Politics (mostly politics, actually). Guns. Cars. It didn’t matter. Another guy was mostly quiet (let’s call him Mr. Quiet), and he mostly sat through the pre-lunch gathering without saying a word. One day Mr. NeverShutUp finally did (shut up, that is), concluding his endless-soliloquy-du-jour with “I don’t what else to say.” Mr. Quiet’s response was immediate. He looked up and said, “Keep talking…you’ll think of something…”
So, why that little story? Because it’s kind of like writing a blog. Over the last few years of grinding out stories (although it wasn’t really grinding; for me and I expect for the others it was fun). It just seemed like I would keep writing and the next story would pop into my mind, or Gresh’s mind, or Huber’s mind, or Surber’s mind, or some of our earlier contributors’ minds (Armenta, Lewis, Welker, Berkuta, Benjamins, Miner, Morgan, and maybe a few others I can’t remember). I/we just kept writing, knowing we’d think of something. Then things slowed. I had run out of topics, and apparently so had most of the other folks. Then my physical condition deteriorated, and it really took a nosedive a few months ago (and maybe that’s why the ideas slowed). For the last few weeks, I couldn’t walk more than a few feet, and I couldn’t stand for more than a minute or two. That mandated the back surgery I wrote about in the last blog.
The surgery was yesterday. I walked out of the hospital. and although I’m armed with a bottle of opioid pills, I’ve not needed them (and no, I’m not interested in selling them). Tylenol is doing the trick for me, and I’m feeling good. I’m going for a walk after I post this blog.
So that’s it for now. I have a few more ideas percolating. The blogs may be at a reduced frequency. Or they may not. We’ll see. And that Pepsi Rolex you see in the above photo? It’s the topic of the next blog. Stay tuned.
Folks, I’ve got to drop the ExNotes blog a gear or two for a while. We’ve been busy for a good 8 years, and I need to roll off the throttle for a bit to get through a rough spot.
During the preceding 8 years, we published 1,786 blogs. These gathered 10,058 comments. Our blogs include 12,913 images (every one of which was Photoshop optimized prior to inclusion in the blog).
During that entire time, sciatica, neuropathy, and a bum leg have been kicking my butt. Things have gotten a lot worse in the last two or three years, the feel-good folks in white coats tell me I need back surgery, and that’s scheduled for late June. I’m getting a laminectomy and a foraminectomy on my L4 and L5 vertebrae (which basically means I’m getting bored and stroked), and incredibly, it’s going to be done on an outpatient basis (which is fine by me).
We’ll keep on publishing during my downtime, but it will be at a reduced frequency until I’m back to 100%. It won’t be too long.
In the meantime, please peruse our past blogs. You can get to them by using our search bar, by using our menu to bring you to the index pages, or by simply scrolling back. Please do so, and please click away maniacally on those popup ads.
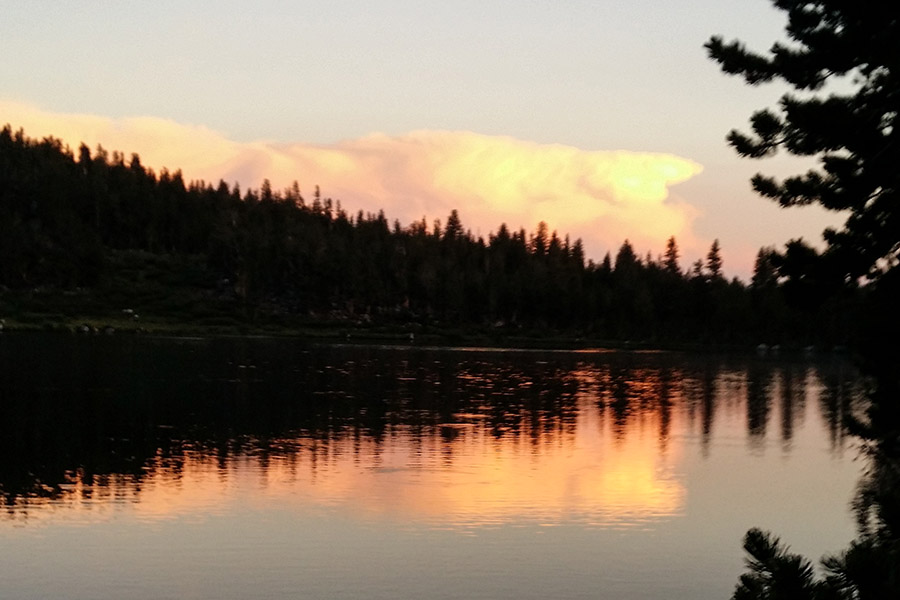
Six days into the John Muir Trail, solo from Yosemite to Whitney, the sun finally came out.
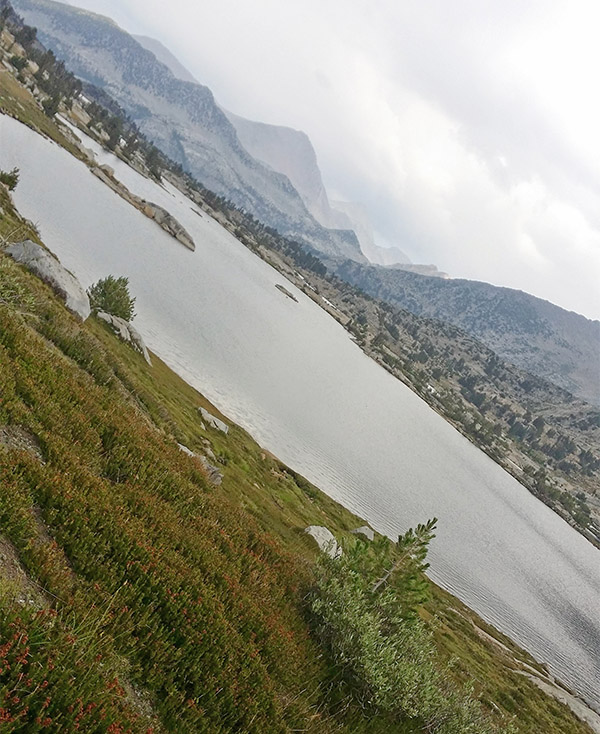
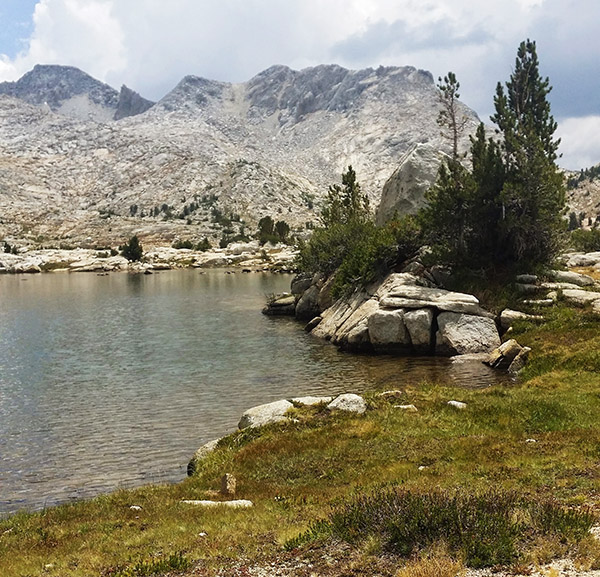
After days of cold rain, wet gear, and afternoon storms, Marie Lake at 10,551 feet felt like permission to stop. People were swimming, drying gear on the granite, stretched out in the sun like nobody wanted to move again.
I swam. Then I fell asleep on the rocks.
While I slept, the Sierra changed its mind.
When I woke up, everyone was gone.
Marie Lake, August 8, 2014.
The granite still held the afternoon warmth, but the sky had changed. The harmless white clouds over Selden Pass had darkened and lowered, moving fast across the ridge. I sat up too quickly, disoriented, alone at 10,551 feet with my boots still off and my gear scattered around me.
I knew better than to cross a Sierra pass in the afternoon in August. I had done it anyway.
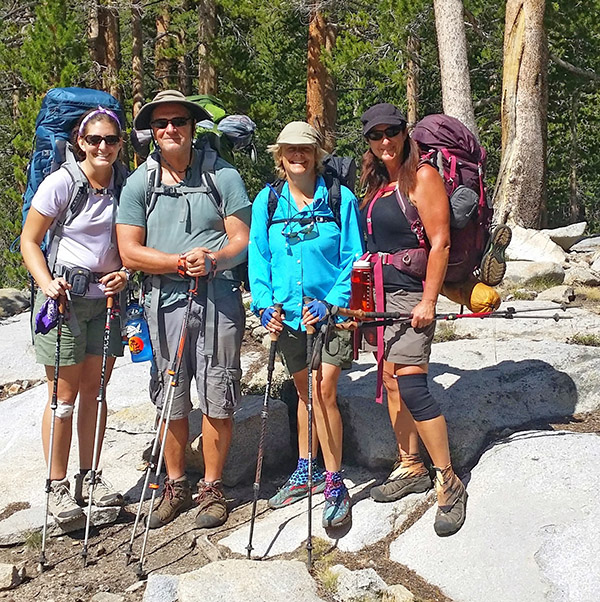
The people I had been walking with that day were already gone. Two siblings and a father-daughter team. I still chuckle at the memory of them giving up their camp stove for camp chairs, living off bars and no-cook food the whole way. The daughter longing for a hot meal. You meet people like that on long trails. When you are lucky, they become part of your trail family.
Trail family on the JMT. Two siblings and a father and daughter, strangers who became familiar faces over days of shared miles. I am on the right with the maroon pack.
But they were gone now.
I packed up quickly and started up Selden Pass.
Marie Lake, 1:42 p.m. The storm was already building.
The last of the small trees gave way to open granite as the storm hit full force. Hail came first, then lightning, the kind that doesn’t stay in the sky.
Hiking poles went aside; metal in a lightning storm above tree line is an invitation. Crouching on top of my pack in lightning position, making myself as small as possible as hail drove into my shoulders and arms. Tank top and shorts. Nothing else.
There was nowhere to hide.
Terrified of the lightning and praying to angels or whatever was listening: just get me over the pass. Just get me through this.
Somehow, I made it to the top. The storm was still building.
I ran four to five miles down toward the tree line, alone, above 10,000 feet, with hail and lightning, barely dressed against the storm. I don’t remember most of it, only the granite slick under my feet. Moving and not stopping because stopping was not an option.
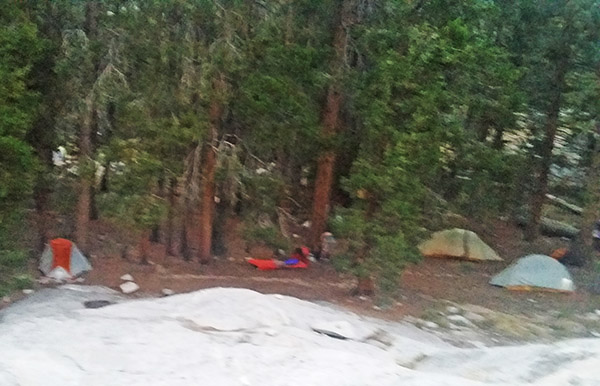
Orange through the trees pulled me toward it. A group of men camped just inside the tree line. They saw me come in, and one of them took charge immediately.
He tried to help me take off my backpack. I fought him. I was being difficult, argumentative, insisting I could do it myself. What I didn’t know was that hypothermia had already taken my hands. My coordination. My judgment. I didn’t understand why the buckles wouldn’t work. I didn’t understand why I couldn’t make my fingers do what I was telling them to do.
He knew. He stopped asking and just did it, manhandled the pack off me, got me into a tent, and used his own body heat to warm me while the others set up my tent and got my gear inside.
I don’t remember his name. I never saw any of them again on the trail.
Camp at Sallie Keyes Lake.
I slept.
When I woke up, the light was going gold through the trees. I walked down to Sallie Keyes Lake and watched the sun set. The sky was doing what Sierra skies do after a storm, going pink and soft over the water.
As I sat in the lake’s peace, I felt a growing frustration with my own stupidity for getting into that situation. Then gratitude so large I didn’t know what to do with it. And then, quietly, as the last light went off the water, I came apart. I cried for a long time. Not the kind that passes quickly. I genuinely believed I didn’t have what it took to finish the trail alone.
The next morning, the trail was still there. And so was I. The same thing that would carry me over Muir Pass three days later was already at work. Not courage. Just an inability to stop.
Sallie Keyes Lake, 7:57 p.m., August 8, 2014.
I have thought about that afternoon many times since. About what fear actually does when it settles into your chest at 10,000 feet, in hail and lightning, with no one coming.
Fear wasn’t something I overcame.
I moved through it, because stopping was never an option.
Subscribe to ExNotes for free!
We need your support! Do what you can to help ExNotes stay in the black!
This is a story that happened long ago. Four of my dirt riding buddies decided to take a street bike trip out to Trinity Site in New Mexico where the first atomic bomb was tested. Trinity is open to the public only a couple days a year as it’s on a military base.
I can’t remember if this story was published in Motorcyclist magazine or anywhere for that matter. It popped up doing research for an upcoming Big Bend Park trip. Here at ExNotes we are environmentally woke so recycling stories is part of our shtick.
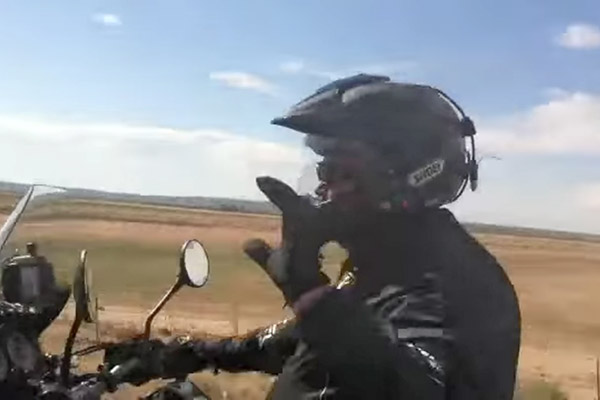
Hondo, Texas, 7:00 p.m., 103 degrees. I’m riding the long way to the site of the world’s first atomic bomb blast in New Mexico for a little fellowshipping with the Sons of Angioplasty. The SOA are a computer-generated, disgracefully aging MC gang best known for their exploits on two-stroke dirtbikes. Besides, Tourmaster sent along some nice motorcycle gear so if nothing else I have cooked up a reason to mention their products twenty or thirty times.
On the way to Carlsbad Caverns. These crappy shots are screen grabs from a video I made about the trip.
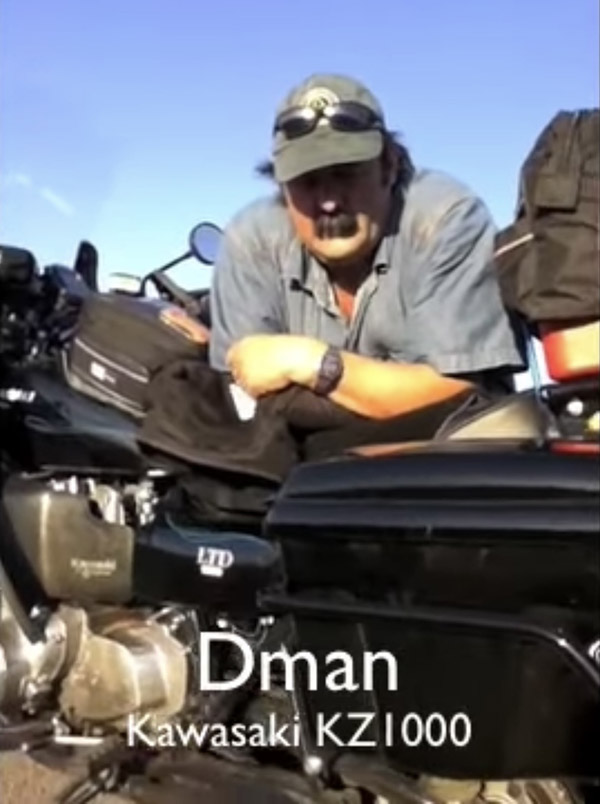
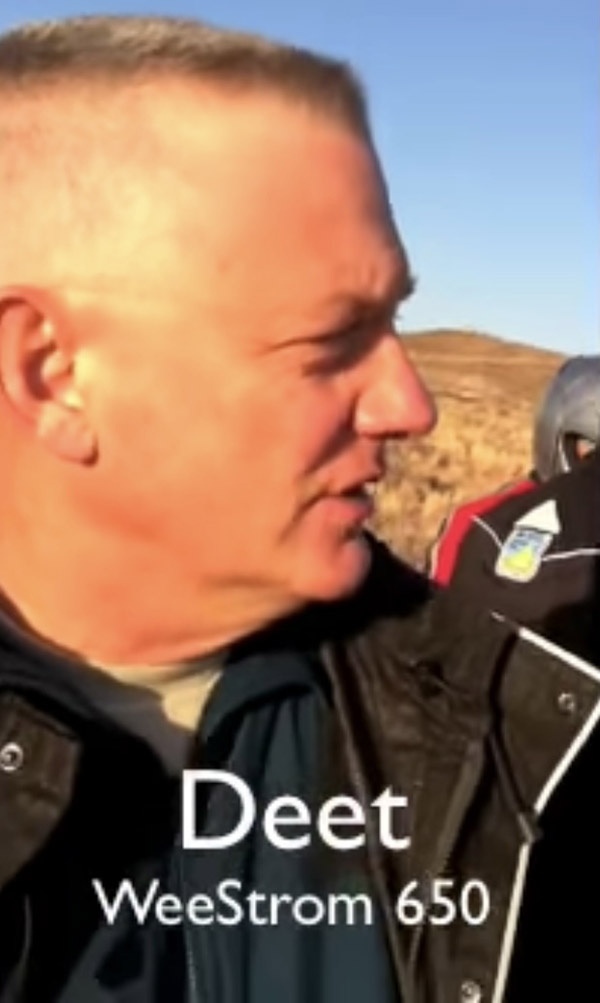
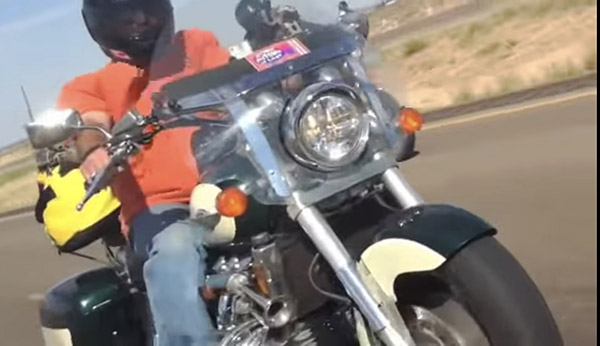
The Sons of Angioplasty ride an erratic collection of motorcycles. Gary’s riding a giant Honda Valkyrie, Vance has a KTM 990, Deet a WeeStrom 650, Greg’s on his brand-new Yamaha FJR1300, me and Dave ride Kawasakis (a KZ900 and a ZRX1100). The riders differ less than the bikes: we are nearly the same age and are all monotonously white.
D-Man’s dead Z1 touring bike.We had an odd collection of bikes on the tour: a Weestrom, KTM990, ZRX1100, Kawasaki Z1-900 and a gigantic stripped down GoldWing.Mako’s big Valk, luxury riding.
Speaking of cooking, when you’re talking dangerous flammable devices I’ve found it’s safest to go home-built. Fabricated from two beer cans and burning denatured alcohol, the Penny Stove (google it) cast its spell on me with the irresistible promise of something for nothing. Three tries, 27 hours of computer research and a 6-week stay at the Betty Ford Clinic later I managed to assemble a working burner.
So there’s another reason to ride, I needed to go camping in order to use the beer-can stove. An expensive sleeping bag was ordered to complement a new 3-man dome tent. I’ll not mention the brand names of products purchased with my own money: we don’t want finance to influence my reviewing.
West on Highway 90 out of Hondo it only gets hotter. I’m wearing the mesh portion of a four-layer, supercalifragilisticexpialidocious, Tourmaster jacket. The mesh flows air so well my ears pop when I remove the wind resistant outer shell. Tourmaster’s hell-for-warm Overpants are less breezy. I leave the long side zippers all the way open, pale, skinny legs lie exposed as the pants flop around like two drowning kittens in a gunnysack. You heard that right, I said drowning kittens in a gunnysack.
South from Marathon, Texas Highway 385 leads to Big Bend National Park. Full of rugged mountains, this out of the way park begs to be photographed. I swing a hard left onto Basin Junction Road then climb 4000 feet into the Chisos Mountains. The temperature drops a degree. I’ve been putting in long days on the green motorcycle that begins with a “K,” so this nearly deserted mountaintop will be my first attempt at camping.
Chisos campground uses the honor system: enclose 14 dollars in an envelope, poke the envelope through a slot in a brown steel pipe. Seems simple enough. I’m filling out the envelope, these friggin’ Tourmaster pants are really warm. Sweat runs down my legs into my boots. My Cessna-print boxers are sopping wet, clinging. Flies strafe my head then light, bellying up to my eyes like regulars at Club Moist Eye. I dig around my wallet, scream in agony and find two fifties and a five. In desperation I plunder the complex pocket system of the magnetic tank bag for hidden bills. Hmmmm, no money: that’ll cost Cortech a star.
I bungee the loose gear onto the motorcycle and we climb higher up the Chisos to the visitor center and the Chisos Mountain Lodge, complete with clean, air-conditioned rooms and a nice restaurant. I book a room, take that stupid camp stove.
From Chisos to Presidio, there’s fabulous Farm-to-Market Highway 170. This beautifully convoluted road parallels the Rio Grande river and the Mexican border. You’ll need to bring ground clearance on this desolate stretch; expect roller coaster first gear turns and lonely canyon views. I wish I could tell you about the tires I bought. They worked great. After Presidio, a straight shot north to Marfa then up into the Davis Mountains.
If you are in the market for a 360cc, twin cylinder, two-stroke Suzuki jeep, look no further than Fort Davis, Texas. The town has cornered the market on these little go-anywhere beasts. I can’t stop though, I’m meeting the SOA in Socorro, New Mexico.
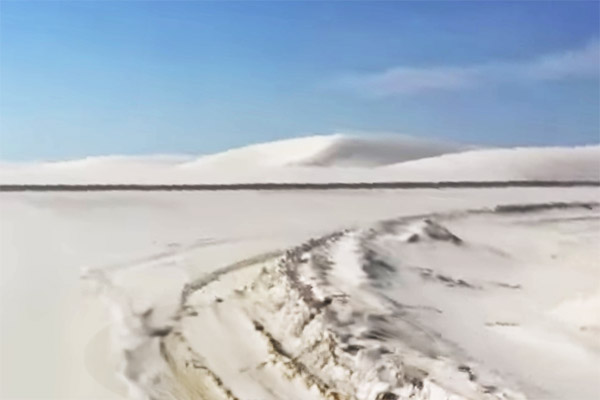
White Sands National Park; now my shack overlooks these sands.
Group riding involves group dynamics and with six riders punching waypoints into 6 navigation machines routing becomes exponentially more dramatic. Leaving Socorro in the cool morning air, bikes carom from the motel parking like pin balls each following his private GPS plot. After a brief reconnoiter the Sons of Angioplasty school-up and ride towards White Sand Missile Range’s Stallion Gate.
Trinity Site is ground zero for The Church of the Bell Ringers of the Apocalypse. The Site is located on a military base and open to the public just two days a year. Trinity marks the precise spot where our modern world began in 1945 with a flash of light seen for hundreds of miles and a demonic roar heard all the way to Hell. Suspended 100 feet above the ground in a steel tower, The Gadget, a plutonium atomic bomb, released the equivalent of twenty thousand tons of TNT, excavating a radioactive depression and forcing the ancient Gods of War to relinquish their sovereignty.
The lineup into Stallion Gate this fine October day is long. Soldiers walk the auto-line explaining military base rules and taking extra time to warn motorcycle riders about free-range Oryx as the antelope-sized animals tend to charge motorcycles. “Stay in the convoy and you’ll be fine.”
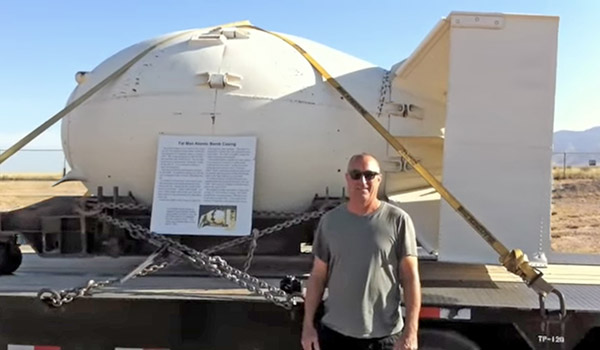
Fat Boy…and a bomb.
Seventeen miles in we come to a circular fence. Corny looking yellow “Warning Radioactive” signs straight out of a 1950 sci-fi movie are spaced along the fence. Souvenir vendors sell A-Bomb t-shirts, A-bomb hamburgers, A-bomb key rings and scads of unrelated alien swarf.
The outer fence surrounds an inner fence where a stone plinth marks the exact spot of the explosion. Stubs of the steel tower legs lie exposed along with a construction covering a portion of undisturbed ground. An inactive Fat Boy bomb sits on a trailer; people sit on it and take photos. The main pit has been filled in over the ensuing 67 years. Intense heat from the explosion created a new kind of radioactive green-glass named Trinitite. Despite the fill, bits of Trinitite can still be found poking out of the ground.
I don’t know what to feel here. I geek out on the technology and the incredible effort plus the pure blind-huevos it took to light this sucker off. Some scientists involved in the project were betting the bomb would ignite the atmosphere and destroy all life on earth but gruesome photographs of flash-fried Japanese bodies and ghostly human shadows eternally cast onto concrete were the ultimate result of that Herculean effort. Hell, I reckon the Japanese would have dropped A-bombs on us if they had them.
Trinity Site is not easy to visit. I’m impressed with the size of the crowd that has made the pilgrimage. There’s a tour bus that takes you a few miles away to the farmhouse where the bomb was assembled. It’s a plain looking stead for such a fiery history.
Always carry AAA…
From White Sands we make tracks for Carlsbad Caverns but Dave’s old Kawasaki fries its voltage regulator in Cloudcroft. Luckily it’s downhill to Alamogordo. Finding a generic regulator has messed up our schedule. The jury-rigged voltage regulator is hot, putting out 16 volts at full chat. Dave installs a voltmeter and by unplugging the regulator at regular intervals keeps the Kawasaki’s battery topped up nicely.
Now we arrive at the caverns late. The last tour has gone and a crisis of leadership unfolds. Gary and Dave want to go west. The nearest motels with vacancies are 40 miles north in the town of Carlsbad. The SOA are getting irritable, groups split off grumbling, there’s talk of mutiny. This whole atomic trip was my idea and it’s falling apart. I shuttle between rival camps and manage to get a quorum on watching the evening bat flight. The millions of flying rats put on such an impressive show we all agree to return tomorrow for the cave tour.
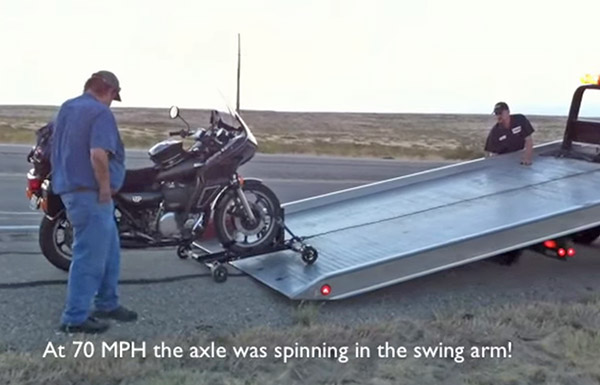
It took an act of congress to gather the SOA at Tina’s Mexican in Carlsbad for our final lunch together. The SOA are a bull-headed bunch and we were itching to strike out on our own. Too much togetherness breeds contempt. Vance and Deet ride east to Oklahoma and North Carolina. Dave, Gary and I head north.
What’s that smell? Riding down the road at 70 MPH I check my bike, something is melting. The smell is stronger near Dave’s KZ. Is that smoke? I flag Dave over, his rear wheel bearings have seized and the axle is spinning in the swing arm adjusters causing paint and chrome to burn.
There are no parts for an old KZ in Roswell New Mexico so AAA picks up Dave’s bike leaving Gary and me to ride in the rain to Moriarity, New Mexico. 2:00 a.m., Dave rumbles up in a U-Haul box truck with the Kawasaki strapped inside.
We split the next morning, Dave in the big U-Haul to Idaho, Gary on the only slightly smaller Valkyrie to Washington state. I ride to Los Alamos then hang a right to Florida. Even though we get on each other’s nerves, I get the feeling The Sons of Angioplasty will ride again. When, I can’t say but after carrying that damn stove for 6000 miles I never did get to cook anything.
Subscribe to ExNotes for free!
We need your support! Do what you can to help ExNotes stay in the black!
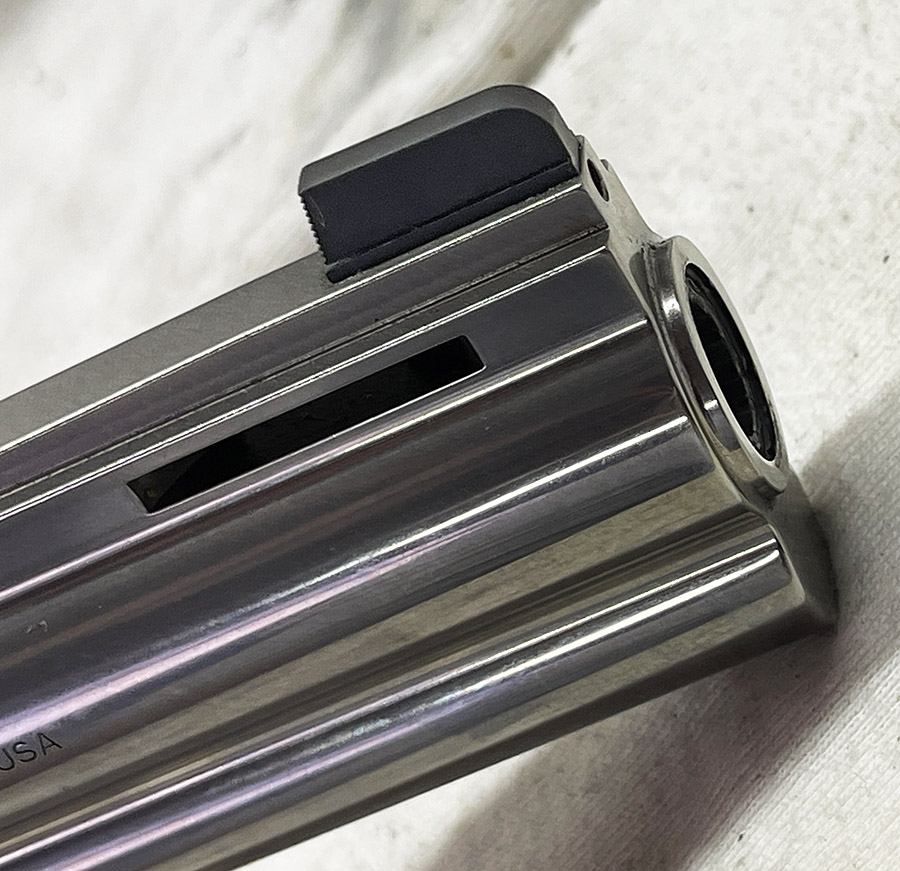
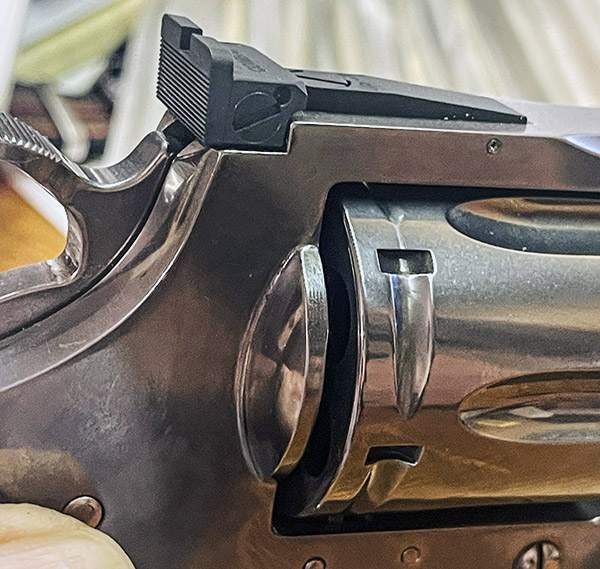
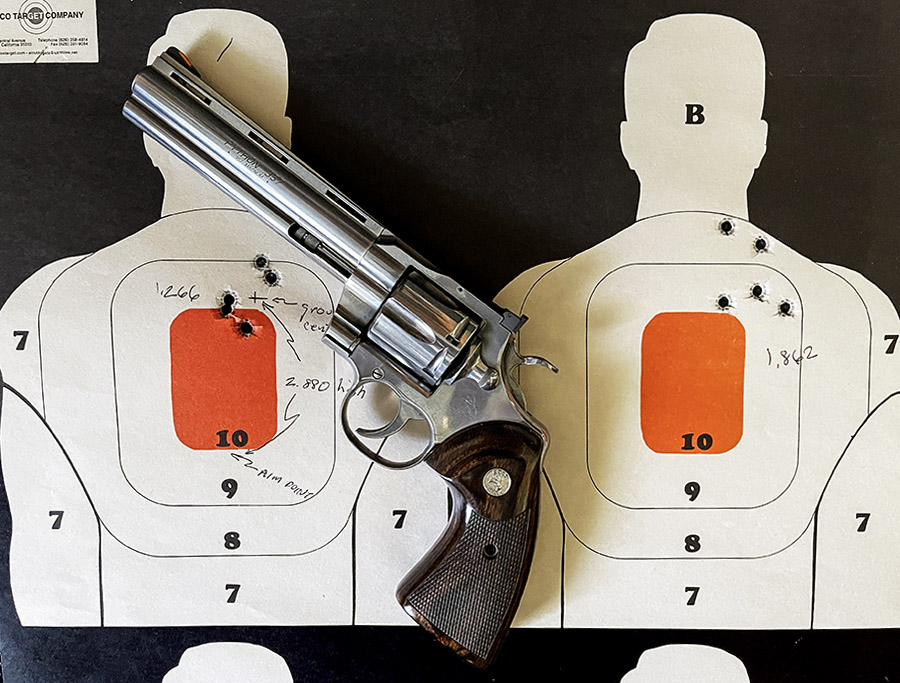
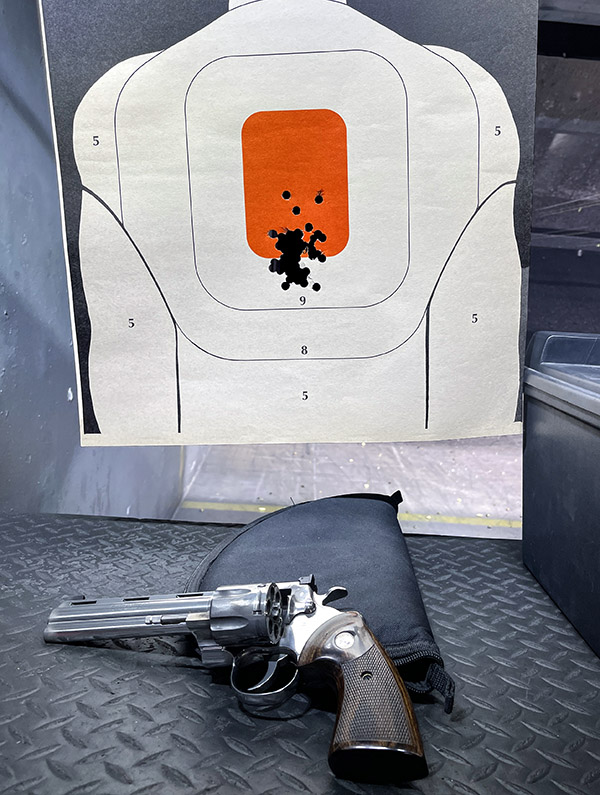
I am enjoying my Colt Python more and more every time I shoot it. The latest improvement is the Harrison Design front sight, as seen in the photo above. Just prior to installing it, I had installed the Wilson Combat rear sight, as seen in the photo below. I covered the Wilson Combat rear sight in my previous blog.
The Wilson Combat Python rear sight. It’s much sturdier than the stock rear sight.
The Wilson Combat rear sight is a solidly built affair, but it sits higher than the stock Python rear sight. That caused my shots to hit high.
Typical targets fired with the Wilson Combat rear sight. These targets were shot at 15 yards, or 45 feet.
I needed a taller front sight to work with the Wilson Combat rear sight. I researched this issue, and apparently I was not alone. Numerous comments appear on various forums identifying the Python shooting high issue with the Wilson Combat rear sight. Harrison Design did something to address it: They offer taller Python front sights.
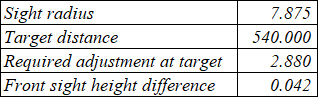
Turning to my junior high school geometry, I calculated the required front sight height based on where my shots were hitting, and the following formula:
The stock Python front sight height is 0.180 inches, the distance to the target is 45 feet, and the distance from the front sight to the rear sight (the sight radius) is 7.875 inches. Plugging those values into an Excel table based on the above formula, I found the front sight height increase I needed.
To go up 2.88 inches at 45 feet, I needed a 0.042-inch taller front sight (the front sight would have to be 0.222 inches high, which is obtained by adding the 0.042-inch additional required front sight height to the stock 0.180-inch stock front sight height). Harrison Design offers taller Python front sight heights of 0.200 inches and 0.230 inches. I chose the 0.230 Harrison Design front sight, as it was closer to the calculated front sight height I needed. I knew I could account for the small difference between the calculated required front sight height increase by simply raising the rear sight.
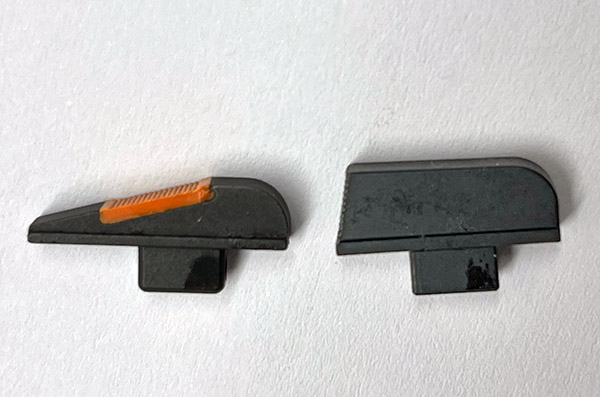
Colt Python stock front sight (left) and the replacement taller Harrison Design front sight. I prefer a plain black front sight as it makes for a clearer sight picture.
I opted for a plain post front sight, as seen in the above photo on the right. Harrison Design offers high visibility front sights (ones with a translucent plastic cord within the sight), gold dot front sights, and perhaps others. For precision work, I’m old school. I greatly prefer a plain post. For me, it’s harder to focus on the top of a red ramp (like the original Colt front sight, shown on the left) or on a gold dot front sight. The gold dots have another issue for me: My point of impact on the target moves around when the lighting changes. I’m not a fan of “gee whiz” front sights. I learned from a master (Sergeant Major Emory Hickman) and I learned on a plain black post front sight. Your mileage may vary.
Harrison Design does a nice job in what they include. In addition to the taller front sight, they provided a separate set screw (not necessary, as I could reuse the original one), a tiny Allen wrench for the set screw (also not necessary, as I already had one), and a set of installation instructions (not necessary for me, as how it all goes together is obvious). But I thought it was nice Harrison Design included all these things. The new front sight slipped right into place. Replacing the original Colt front sight with the taller Harrison Design front sight took less than a minute.
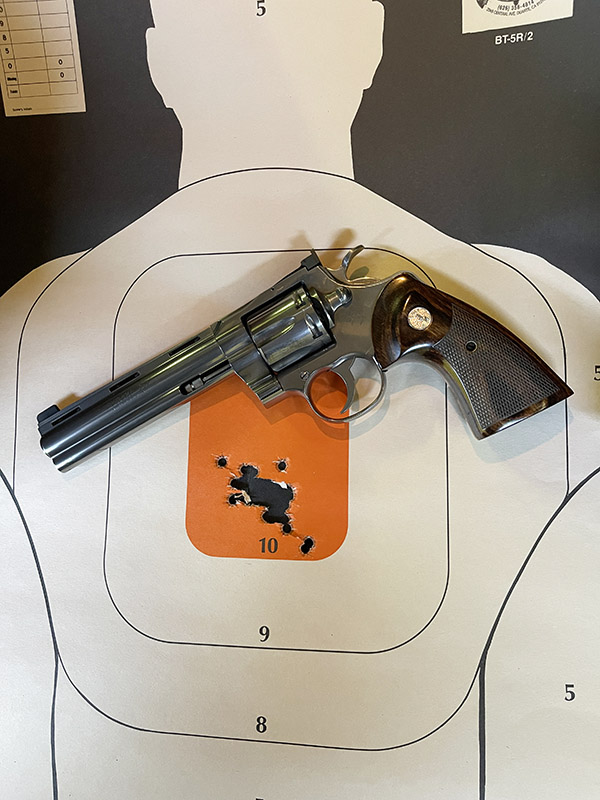
So how did it all work on the range? Pretty much just like the numbers said it should.
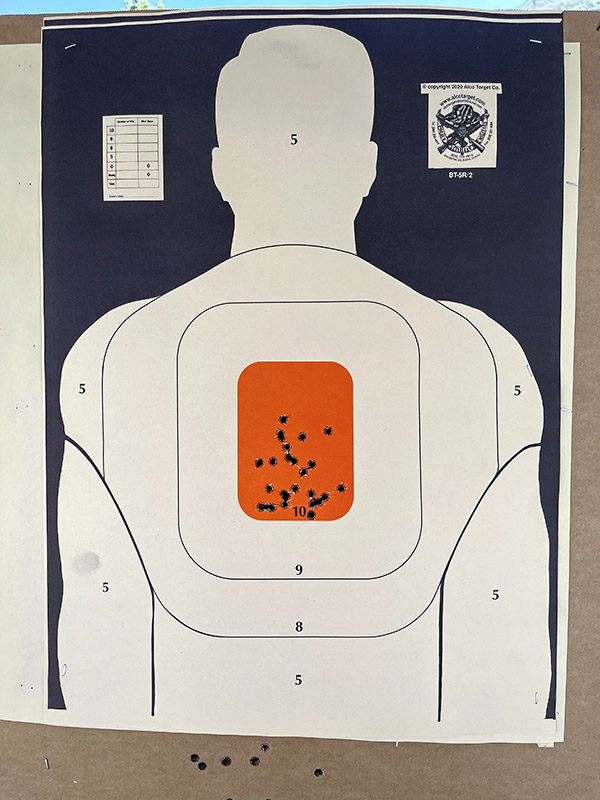
A 50-foot target shot with the new Harrison Design front sight and the Wilson Combat rear sight. Point of aim was at 6:00 on the orange bullseye. The load I used for this target was Missouri Bullets’ 180-grain truncated roundnose cast bullet and 14.0 grains of IMR 4227 (a max load).Same as above, but with 148-grain wadcutter, 2.7-grains of Bullseye target loads, fired at 50 feet.A “first look” type of target at 25 yards. The load was Missouri Bullets’ 180-grain truncated roundnose cast bullet and 14.0 grains of IMR 4227 (a max load). There’s a little more spread than I find acceptable, but I attribute that to bullet casting defects I’ll cover in a subsequent blog.
The bottom line is I am a satisfied customer. Harrison Design makes a good product.
Coming up? I’m going to run another set of Python tests assessing cast bullet base imperfections and their effect on accuracy, and then yet another assessing accuracy at 25, 50, and 100 yards. Then I’m going pig hunting with the Python.
Stay tuned.
Subscribe to ExNotes for free!
We need your support! Do what you can to help ExNotes stay in the black!